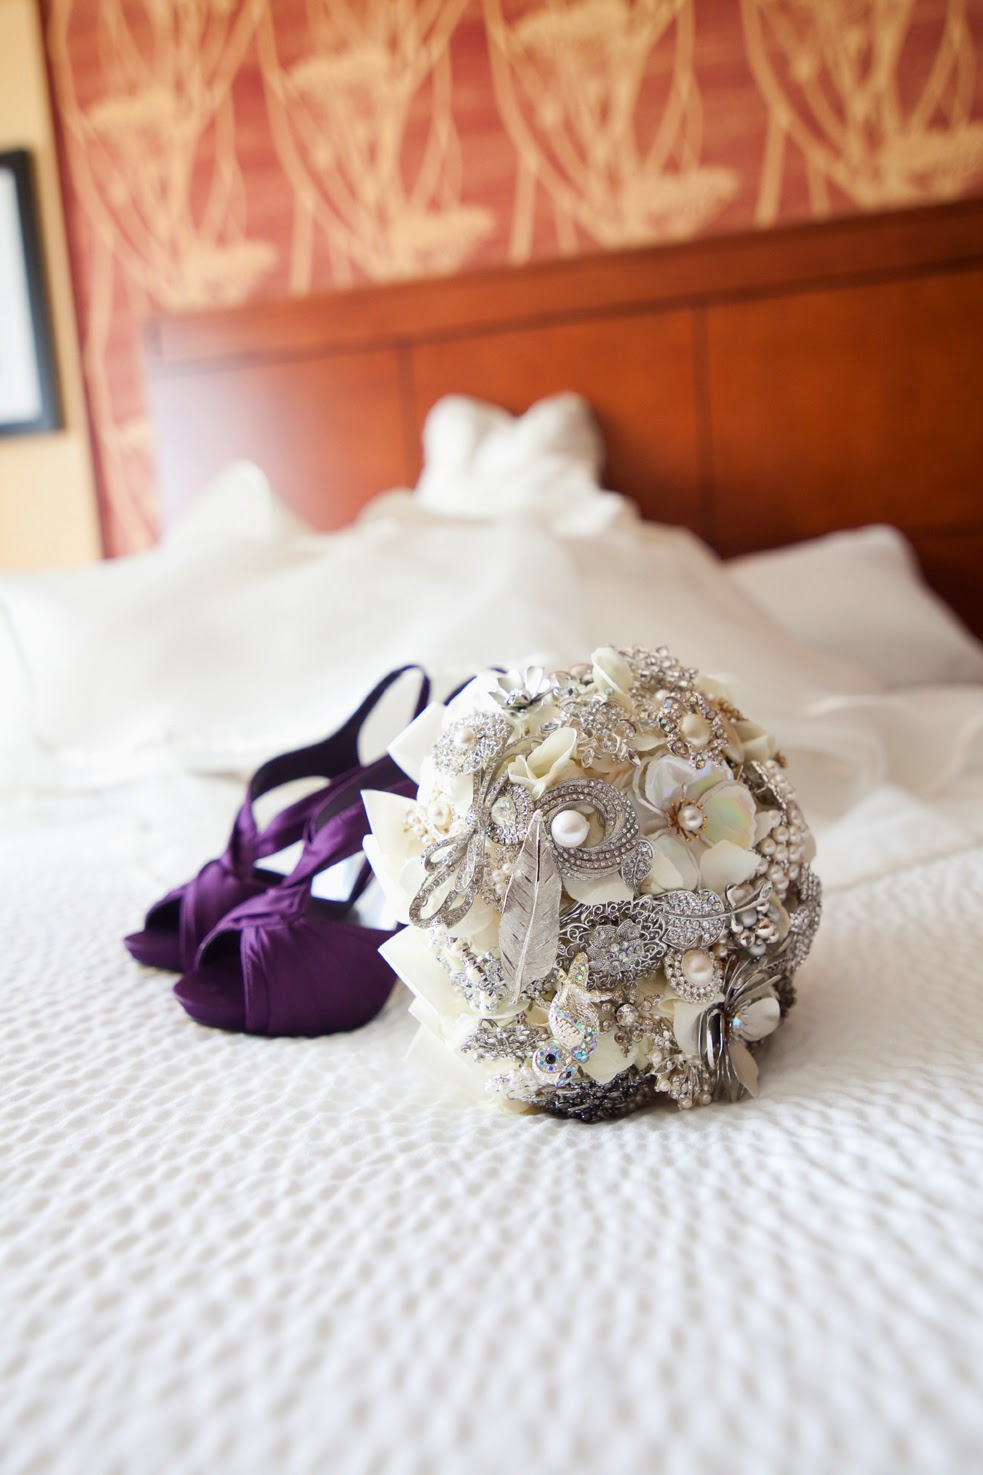
I love how weddings can be so different but equally as full of love and as fun as each other. I'm going to a friend's wedding shower this weekend and her excitement about her upcoming wedding reminded me of one of my favorite things from my own:
My Bouquet!
I made my bouquet (and my bridesmaids') with a little help from my mom, friends, and Dan. The process was fairly time consuming and could be expensive (depending on the direction you decide to take), but was totally worth it for me.
I had been dabbling in wedding things via Pinterest and Etsy for a little while before Dan and I were engaged. (We had been dating for about nine years, so I had a pretty good idea that an engagement/wedding was coming). Somehow, I came across brooch bouquets and thought they were awesome. I tried explaining the idea to my mom and friends, and I could tell that they thought it could be a cool idea, but couldn't really picture it in real life. Being the wonderful people they are, they started collecting brooches for me anyway.

Between August 2012 and September 2013, we collected about 120 brooches (and some earrings and some buttons). They came from thrift shops, antique shops, ebay, and people's own stashes :) My personal rule was that I wouldn't spend more than $3.00 on a brooch unless is was
really cool or
really big. If I would have bought all of the brooches myself and stuck to the $3.00 a brooch rule, I would have spent $360.00 on brooches alone. In reality, I ended up spending about $100.00 on brooches over the course of a year. Not too bad.
Once (almost) all of the brooches were collected, I started assembling the brooch "flowers". This is the time consuming part. I really have no idea how long this part took- I had help from my mom and sisters, help from Dan, and help from friends. I worked on a little bit at a time. I started making the "flowers" on the 2nd of July and finished the final bouquets mid-October. This might seem like I stretched out the process over a long time (and I did) but it made the process way less stressful than it would have been had I tried doing it all at once.
To make the brooch flowers you need:
- wire (you can get it in pretty much any color and gauge-I used silver because it blends with the brooches better and I can't remember what gauge I used but I feel like maybe it was 20)
- needle nose pliers (to save your fingers from pain and agony)
- brooches (I used about 60 for my bouquet and about 10 in each of the bridesmaids')
-florist tape (green or white- I used white because I knew I was going to wrap the "stems" in cream colored ribbon, but green could blend into flower stems better)
How to Make the Brooch Flowers:
1. Choose a brooch. Start with on that has lots of "holes" in the top- it makes figuring out this process easier.
2. Cut a piece of wire that is about 20-24 inches long. String the wire through one of the "holes" in the brooch so that you can create a "stem". If you are holding the "flower" by the bottom of the "stem" it should look like you are holding two wires- one wire the goes up, then the wire curves through the brooch, and then it curves back down through the brooch and into your hand.
3. Twist the two parts of the wire together- here is where the needle nose pliers come in. Use them to get a good twist. If you don't, you will regret it :)
4. Depending on how heavy the brooch is, you might need to repeat the wire part. If you can hold the "flower" by the "stem" and it doesn't look like it's wilting, you're good! If it starts to wilt, add more wire.
5. Wrap the "stem" in floral tape. It will make your fingers sticky.
6. Admire your work.
7. Repeat all steps until you don't think you can repeat anymore.
 |
The blisters were worth it, right Sarah?
Seriously- Thanks for helping me! |
 |
| I know the picture isn't the greatest, but it shows some of the finished brooch "flowers" |
To make this bouquet work, it needed a base. I used some nice fake flowers as my base. You could definitely use real flowers, but with all of the positioning and repositioning of the brooch flowers, the real ones would look pretty sad by the time you were done with them. Plus, you couldn't make a bouquet very far in advance.
My mom and I found some nice looking fake hydrangeas at Hobby Lobby. Remember you are going to cover the flowers in brooches, so you will only see little sneak peaks of them. I used three in my bouquet and two in the bridesmaids.
How to Assemble the Bouquet:
1. Decide how big you want your bouquet, buy flowers accordingly.
2. Start by adding one or two or three brooch flowers to your base flower and use florist tape to secure the stems together. Don't push your brooch flowers too deep into the base flower or you won't see the brooches. (I found it easier to start with one stem at a time and add brooch flowers to it, then put three mini bouquets together- do what works best for you.)
3. Keep adding and taping brooch flowers until your base flowers are covered nicely. You might add something and decide you want it somewhere else- that's okay as long as you realize this before it's taped too deeply in the mix.
4. The bouquet is going to get heavy from all of the brooches- decide if you want to carry a huge weight around for your whole wedding.
5. Realize that it's going to look awesome and you will continue toning your arms even during the ceremony.
6. Once all of the brooch flowers are added to the base flowers, give the stems a good wrapping in tape.
 |
| Bridesmaids' bouquets- brooches added (I only had brooches go down the middle of theirs), stems wrapped |
7. Cut off the excess wire and stems. Decide how long you want your stems to be and cut everything off at the point. I couldn't find an easy way to do this. I used wire cutters and snipped a little off at a time.
8. Decorate the stem area. I didn't want any wire showing, so I made little ribbon loops that kind of peeked out from under the bouquet (see the photo below). To make these, cut strips of ribbon, fold them in half, and tape around the base of the bouquet. This was my least favorite part- probably because I did it at night when I was tired, stressed, and hungry- not a good combination!
9. Wrap the stem. I took a strip and covered the bottom. Then a cut another strip and covered the bottom in the opposite way (so there was an 'X' of ribbon at the bottom of the bouquet.) Tape around this 'X'.
10. Then, keeping the ribbon connected to the spool, I covered the bottom one more time. Instead of cutting anything, I took the rest of the ribbon and wrapped it around the stems. I started close to the top and worked my way towards the bottom. The ribbon overlapped itself as a I wrapped it tightly around the stem.
11. At the bottom, cut the ribbon, fold the end under itself, and use pins to secure the ribbon.
12. Check out all your hard work!
Incase you need a breakdown on cost, here it is (
I got my supplies at Hobby Lobby and Joann Fabrics):
What this could have cost to make One Bride's bouquet and Six Bridesmaids' bouquets had I not looked for sales and deals and such:
Brooches: $360.00 plus
Wire: 4 packs- not sure how many yards- at $2.00 each= $8.00 total
Tape: a pack of 3 rolls for $3.00- 2 packs = $6.00
Flowers: $8.99 a stem for 15 stems = 134.85
Ribbon: $2.99 for 10 yards of 1 1/2 inch thick satin cream ribbon- three rolls- 8.97
Pins: box of 144 for $4.99
Total: 522.81
What making 7 bouquets Actually Cost Me:
Brooches: $100.00
Wire: 4 packs- not sure how many yards- at $2.00 each= $8.00 total
Tape: a pack of 3 rolls for $3.00- 2 packs = $6.00
Flowers: $4.49 a stem for 15 stems= 67.35
Ribbon: $2.99 for 10 yards of 1 1/2 inch thick satin cream ribbon- three rolls- 8.97
Pins: $3.99 for a box of 144
Total: 194.31
To make Just my Bouquet, it would have Cost:
Brooches: 100.00
Wire: 2.00
Tape: 3.00
Flowers: 13.47
Ribbon: 2.99
Pins: 3.00
Total: 124.46
Even though they turned out to be a lot of work, I would definitely do this again. I can keep it forever and/or let friends and siblings use it if they want because it can never die :) My bouquet turned out to be beautiful.